

Sourdough Maple Oatmeal Sandwich Bread
With step-by-step instructions on how to begin a sourdough starter

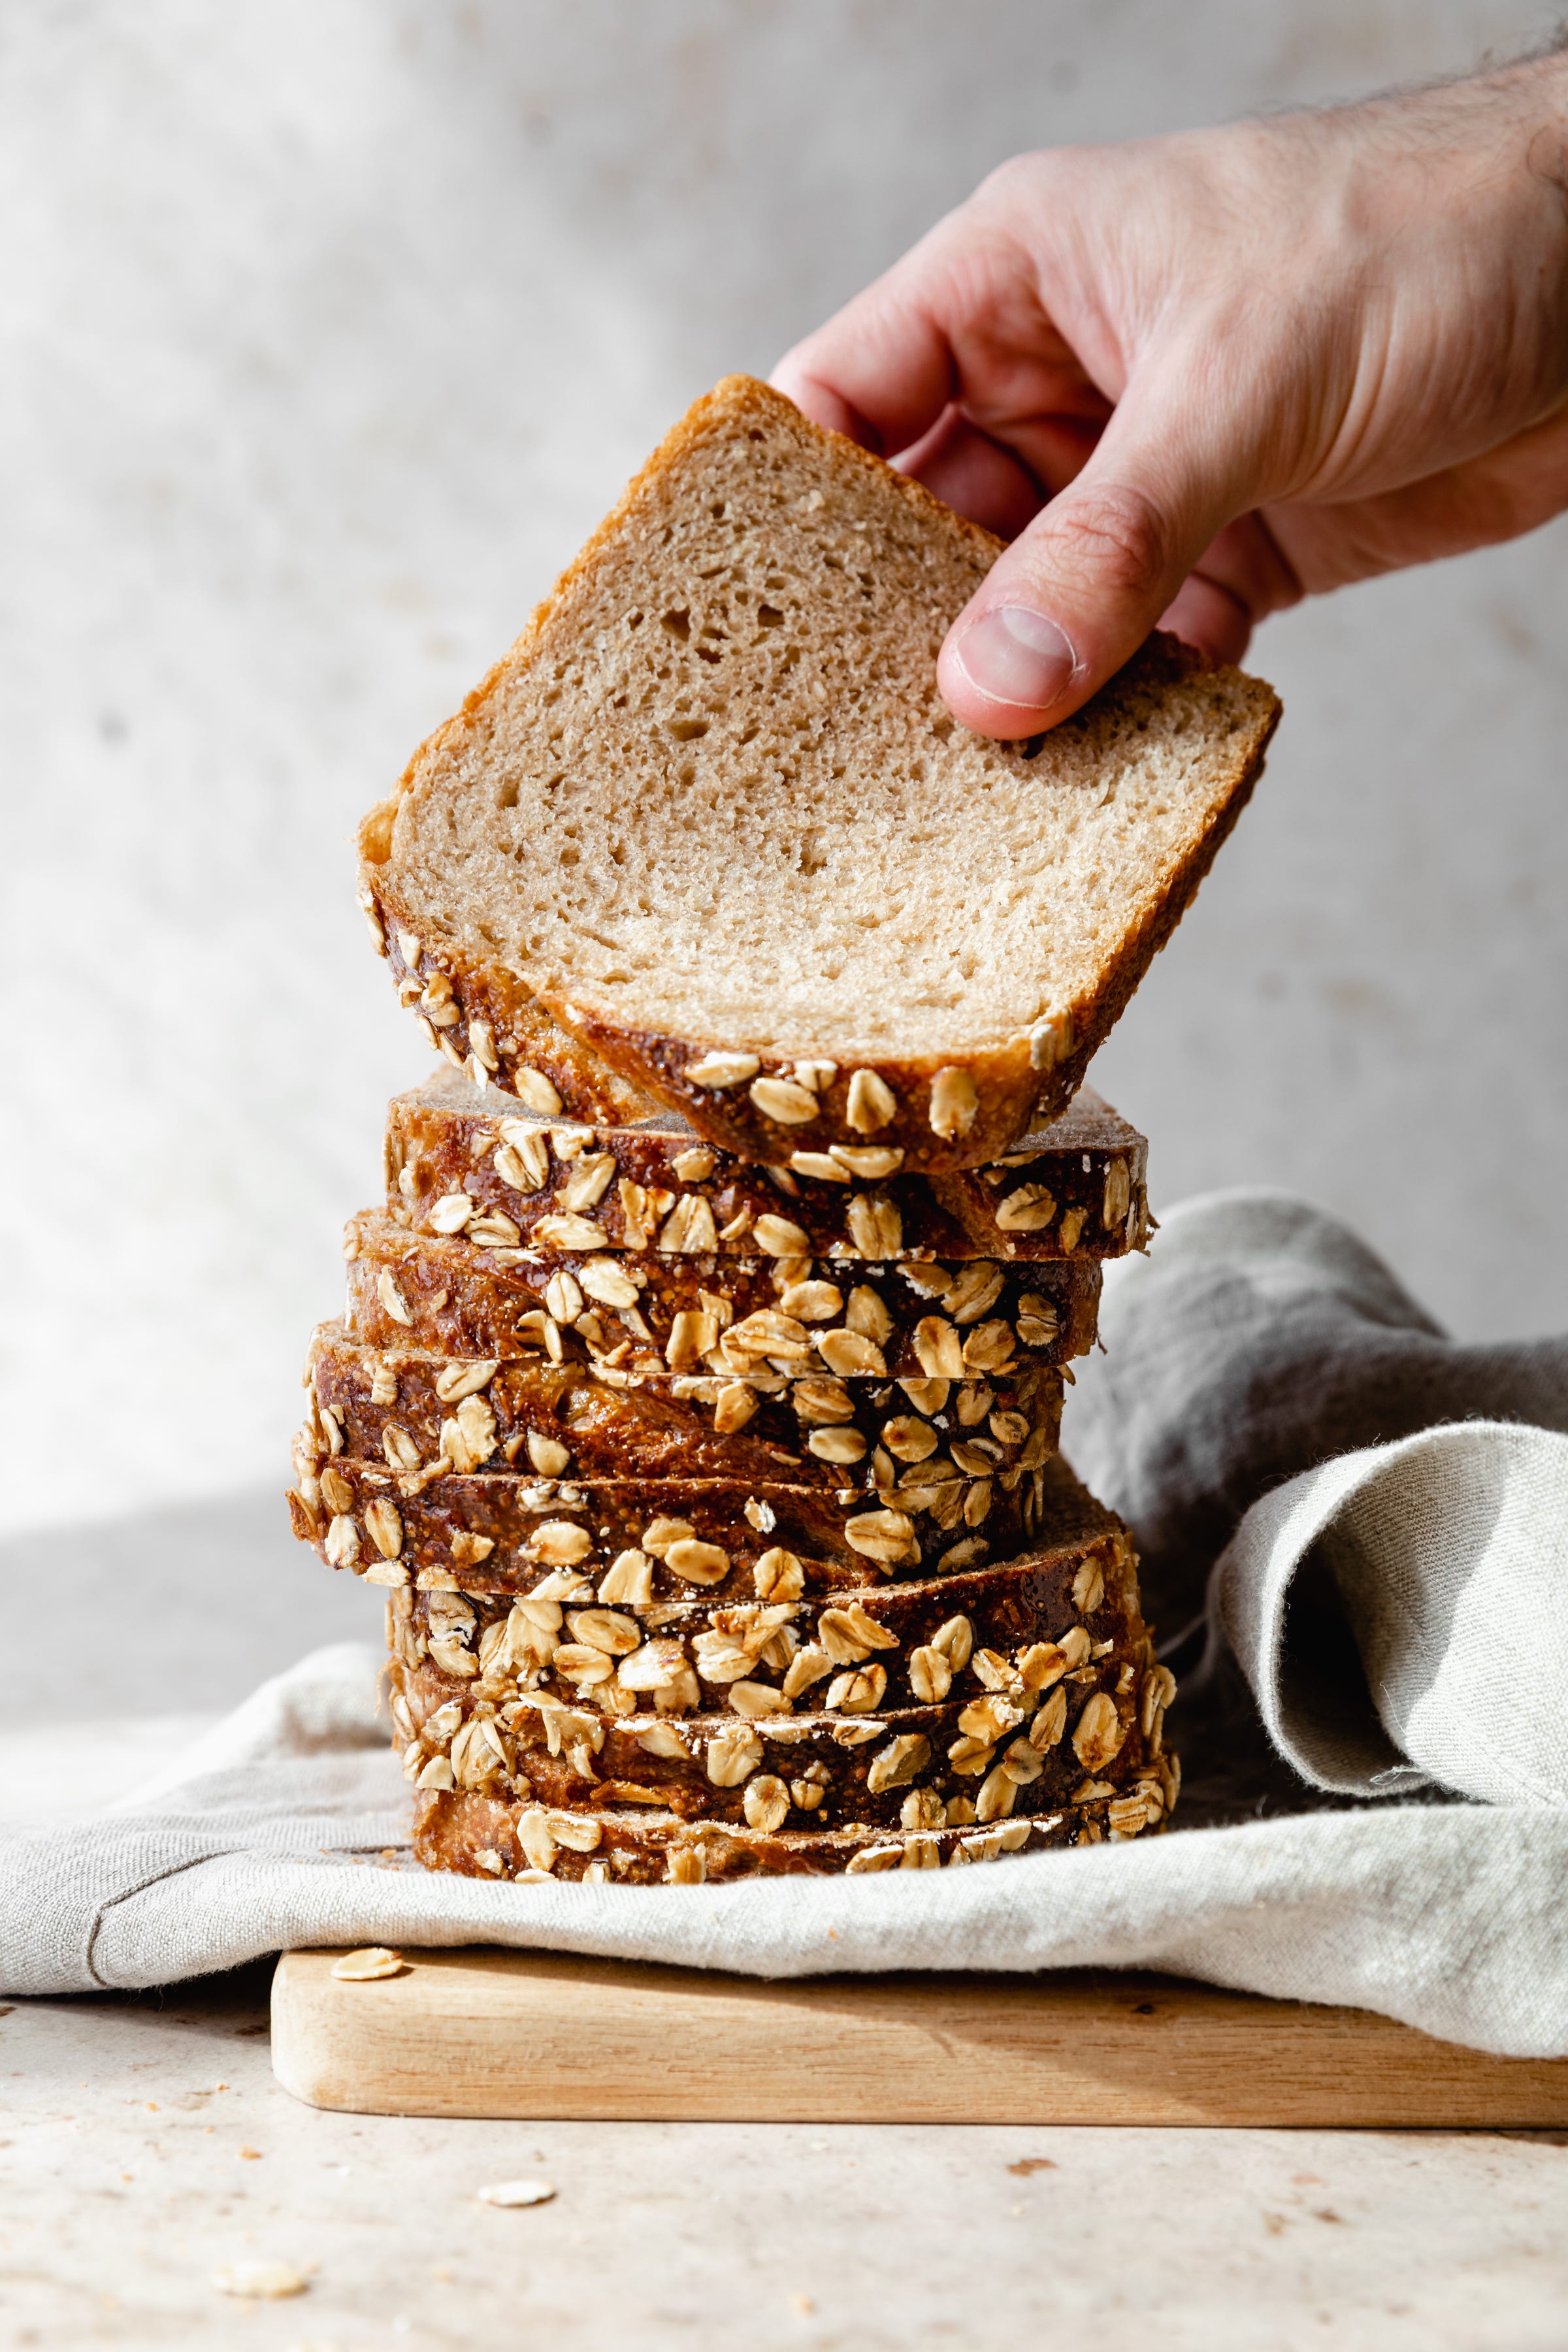
Continuing with the fall flavors, this week’s recipe for paid subscribers is a delightful plant-based sourdough sandwich loaf, infused with maple syrup both inside and out. The bread has a toothsome nuttiness from whole wheat flour and oats, a plush crumb from a tangzhong (milk and flour paste), and it is leavened entirely with natural yeasts. And as a bonus for free subscribers, I’ve included the recipe for my four-day sourdough starter below. If it’s your first time making starter, this is the recipe for you - truly foolproof! And the perfect bread to use it in? You guessed it. Read on for more, and happy baking :)

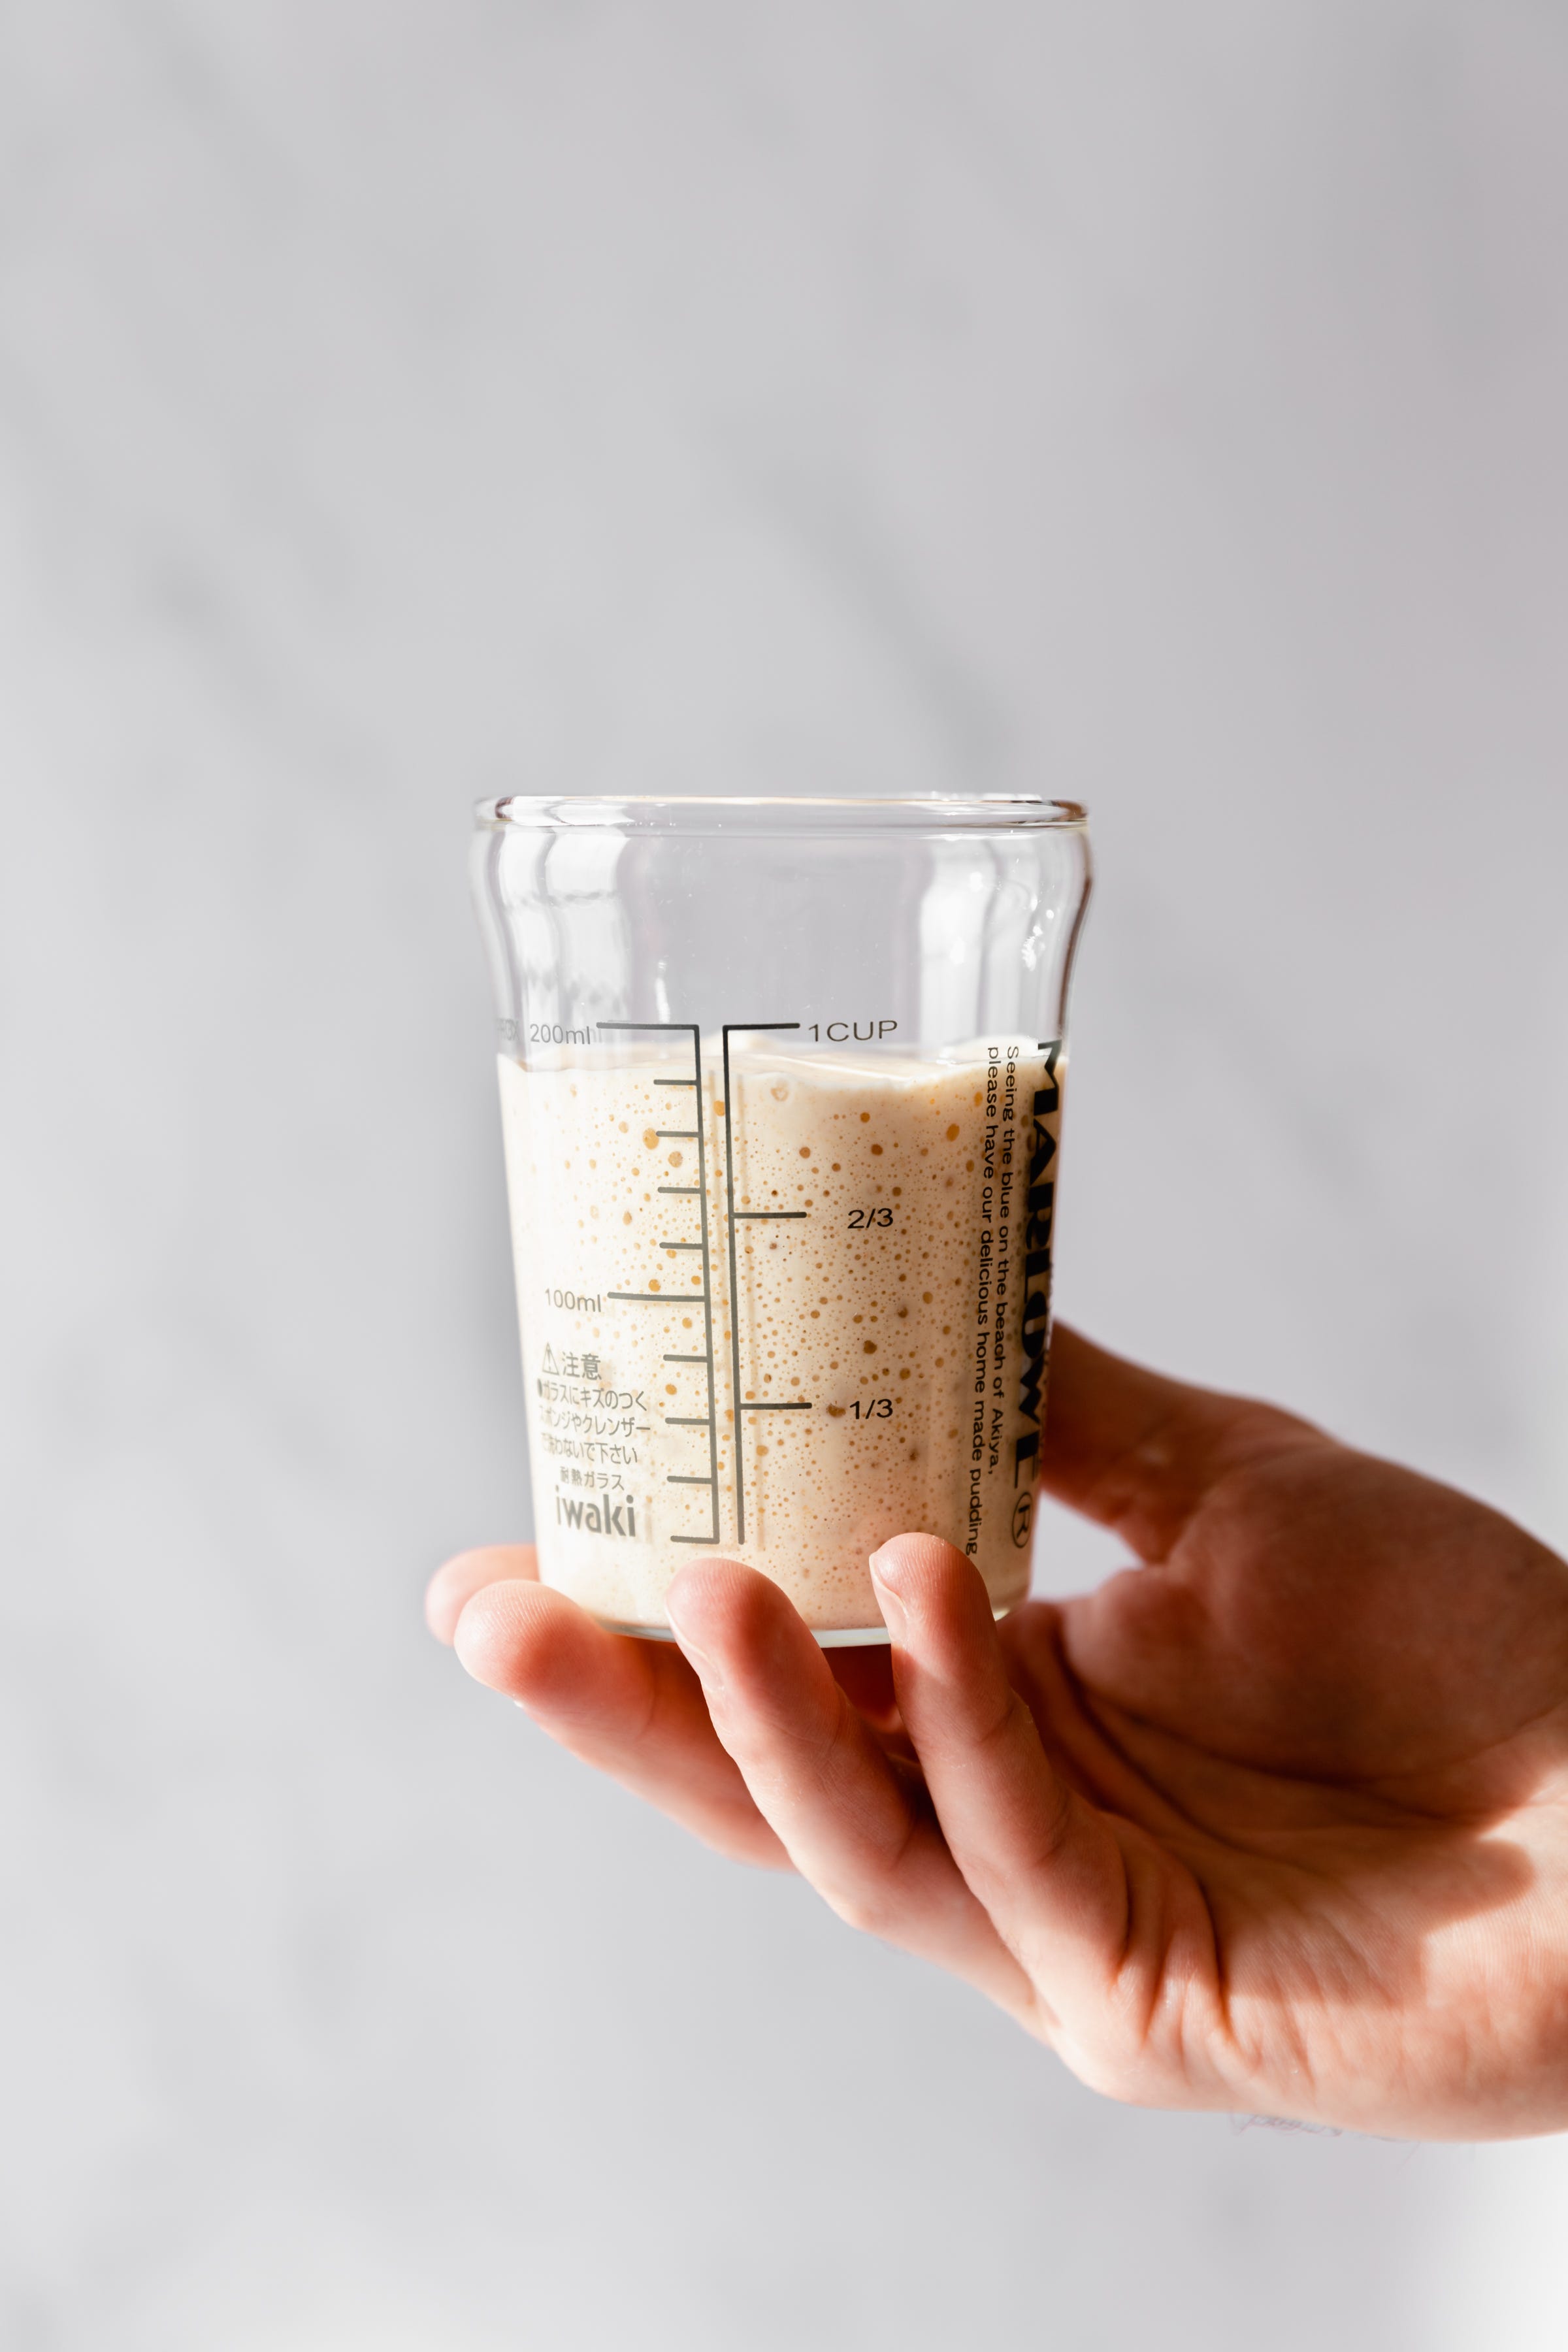
In my experience, making sourdough starter can be a frustrating process. The first few times I tried to make my own starter, it took more than a week to see any activity, and even then I couldn't really use my starter. This recipe is based on a method I learned in cooking school at Le Cordon Bleu Paris, and it produces a foolproof starter that is ready to use in four days. Using a tabletop proofer is enormously helpful in maintaining the relatively high temperatures and humidity levels required to get a starter going, not to mention proofing bread in general. I highly recommend the investment if you plan to bake bread going forward. I have linked to the one I use below.
Four-Day Sourdough Starter
Makes 90 g starter, enough for 2 loaves
1 hour active time, 4 days total time
Ingredients
Day 1 Starter
15 g (2 tbsp) all-purpose flour
15 g (2 tbsp) whole wheat flour
10 g (2 tsp) maple syrup
10 g (2 tsp) unfiltered apple juice or apple cider
15 g (1 tbsp) water at 120 F
Day 2 Starter
30 g Day 1 Starter
15 g (2 tbsp) all-purpose flour
15 g (2 tbsp) whole wheat flour
30 g (2 tbsp) water at 105 F
Day 3 Starter
30 g Day 2 Starter
15 g (2 tbsp) all-purpose flour
15 g (2 tbsp) whole wheat flour
30 g (2 tbsp) water at 105 F
Day 4 Starter
30 g Day 3 Starter
25 g (3 tbsp + 1 tsp) all-purpose flour
5 g (2 tsp) whole wheat flour
30 g (2 tbsp) water at 105 F
Ongoing Starter
30 g Day 4 or existing starter
25 g (3 tbsp + 1 tsp) all-purpose flour
5 g (2 tsp) whole wheat flour
30 g (2 tbsp) water at 105 F
Instructions
Make Day 1 Starter
Combine all ingredients in a small bowl
Mix with a rubber spatula until the ingredients are thoroughly incorporated (the more you mix, the more air will be incorporated into the starter, which will help feed the natural yeasts)
Place the mixture in a clean jar and cover loosely with plastic wrap (we want some contact with the air as this is where many of the natural yeasts come from, but we don't want the starter to dry out)
Pour 1/4 cup of water into the pan of a tabletop proofer and set the proofer to 95 F
Place the jar in the proofer. Cover and leave to ferment for 24 hours
Make Day 2 Starter
Combine all ingredients in a small bowl; discard remaining Day 1 Starter and rinse out jar
Mix with a rubber spatula until the ingredients are thoroughly incorporated
Place the mixture back in the clean jar and cover loosely with plastic wrap
Refill the water pan and turn down the proofer to 85 F
Place the jar in the proofer. Cover and leave to ferment for 18 hours
Make Day 3 Starter
Combine all ingredients in a small bowl; discard remaining Day 2 Starter and rinse out jar
Mix with a rubber spatula until the ingredients are thoroughly incorporated
Place the mixture back in the clean jar and cover loosely with plastic wrap
Refill the water pan and turn down the proofer to 82 F
Place the jar in the proofer. Cover and leave to ferment for 18 hours
Make Day 4 Starter
Combine all ingredients in a small bowl; discard remaining Day 3 Starter and rinse out jar
Mix with a rubber spatula until the ingredients are thoroughly incorporated
Place the mixture back in the clean jar and cover loosely with plastic wrap
Refill the water pan, keeping the proofer at 82 F
Place the jar in the proofer. Cover and leave to ferment for 12 hours
At this point, the starter should have at least doubled in size (it is okay, expected even, that it doubles or triples and then actually falls back down before the 12 hours have elapsed)
If the starter has not doubled in size, repeat steps 1 - 5 of this section until it does
Once the starter doubles in size within a 12-hour period, it can be used for baking immediately, or it can be prepared for storage
Preparing Ongoing Starter for storage
Combine all ingredients in a small bowl; discard the remaining starter and rinse out the jar
Mix with a rubber spatula until the ingredients are thoroughly incorporated
Place the mixture back in the clean jar and cover loosely with plastic wrap
Refill the water pan, keeping the proofer at 82 F
Place the jar in the proofer. Cover and leave to ferment for 3 hours (the starter should rise actively during this period)
Cover the jar tightly with plastic, and place it in the refrigerator for up to 1 week
Refreshing or bringing Ongoing Starter out of storage for use
Combine all ingredients in a small bowl; discard the remaining starter and rinse out the jar
Mix with a rubber spatula until the ingredients are thoroughly incorporated
Place the mixture back in the clean jar and cover loosely with plastic wrap
Pour 1/4 cup of water into the pan of a tabletop proofer and set the proofer to 82 F
Place the jar in the proofer. Cover and leave to ferment for 12 hours (the starter should double in size over this period)
If the starter has not doubled in size, repeat steps 1 - 5 of this section until it does
Once the starter doubles in size, it can be used for baking immediately

Notes & Variations
This recipe can be scaled up to produce as much starter as you need for a given recipe; calculate the amount of starter needed, and scale up the starter based on that amount
Discard can be kept in the fridge and used for up to one week in recipes that call for "sourdough discard" or that do not require an active sourdough starter
Things I Used
As an Amazon Affiliate and Food52 Curator, I earn a small commission on anything purchased through these links
Ingredients
Equipment
Brød & Taylor countertop proofer

I always like to have a loaf of fresh sandwich bread lying around for a quick lunchtime panini or a PB&J pick-me-up in the afternoon. A pan loaf, as this shape is called, is also one of the most foolproof for a beginning bread baker; the pan does most of the work for you! This recipe combines the goodness of whole wheat flour, nuttiness of oats, and autumnal sweetness of maple syrup for a soft, squishy slice that is perfect at any time of day, or in any season.

